
We're going to be getting all our seeds started soon, they need a home! So I went to town rearranging the living room, trying to make a place to put our seedlings. Eventually, the spider grasses gave up their place in the window to sit on top of our big cabinet. Our leaf banner that had been above the cabinet was moved to our bedroom to make room for the Christmas wreath, and I've been trying to fill the space with candles and such ever since the wreath came down. When I placed the plants on top, though, Kaia said that they needed a sun. I thought that was a fantastic idea!
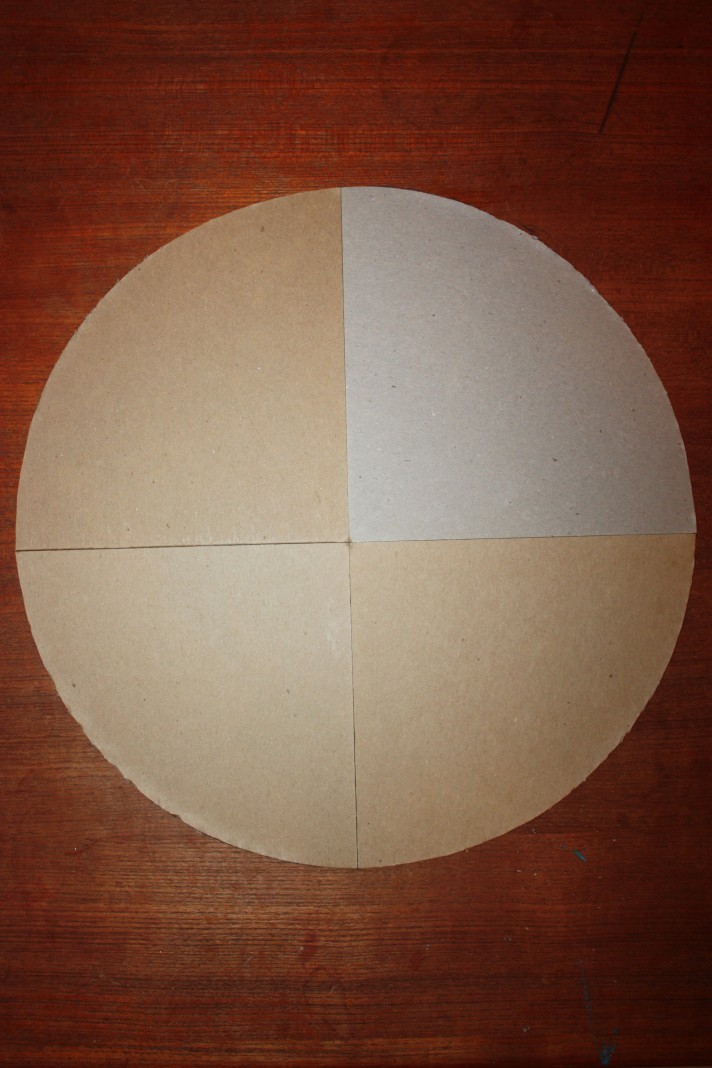
We set to. We had four pieces of paperboard that we'd saved from packages of paper. I lined these up and used the biggest circle I could find to trace (a pizza pan,) and cut it out.

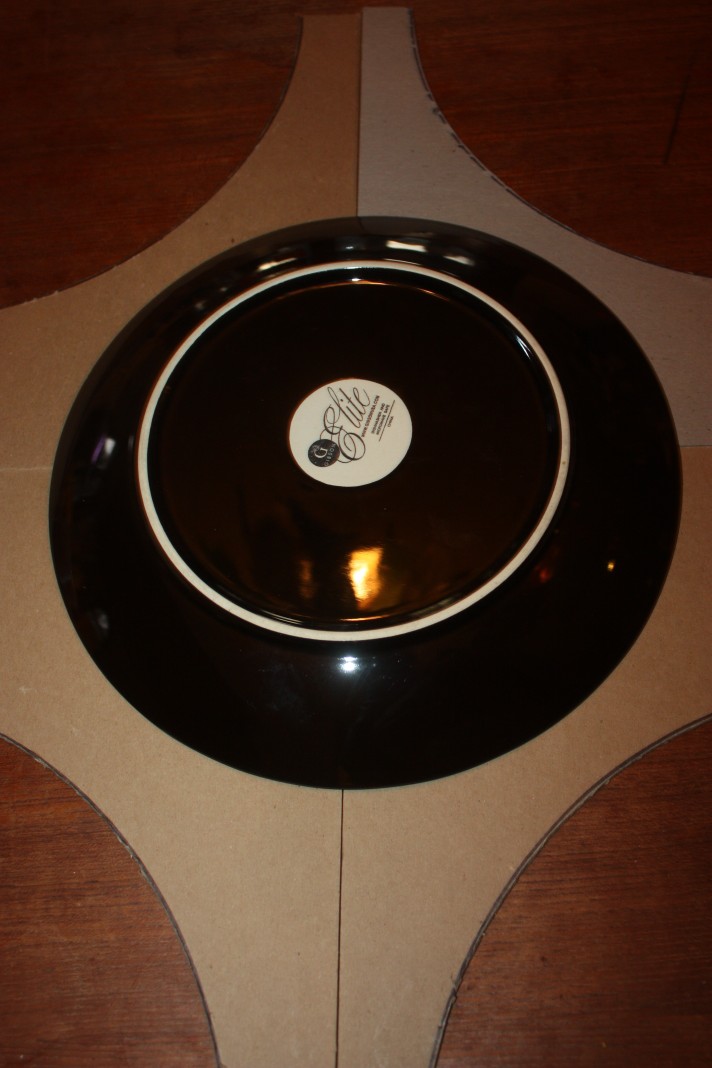
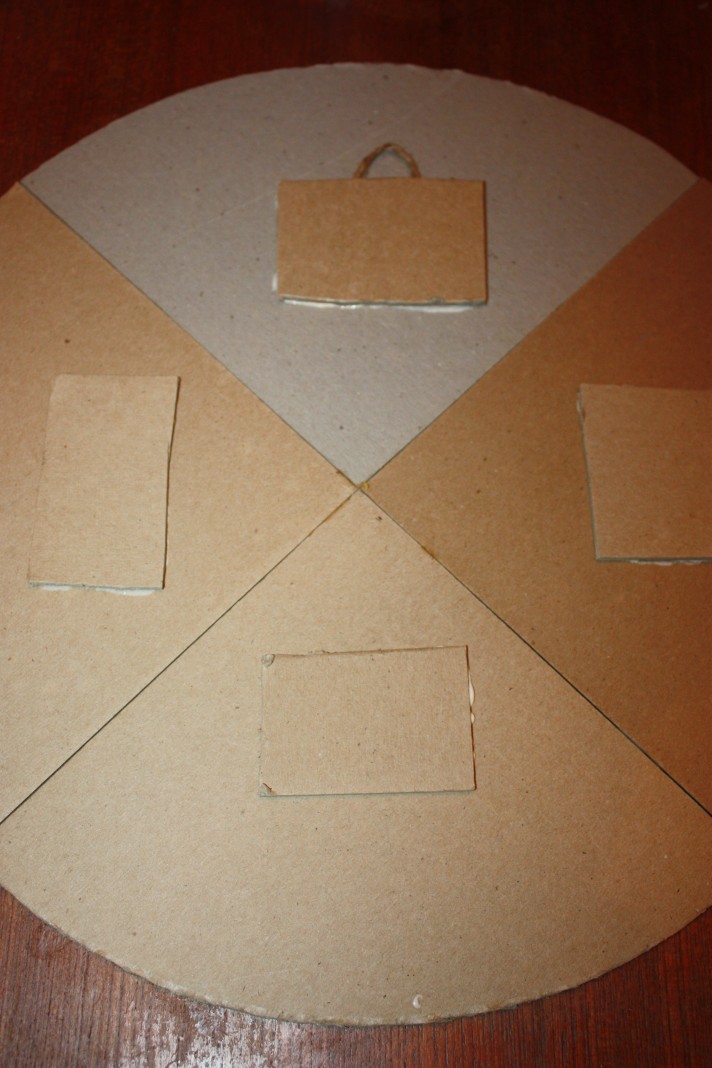
Then, I put the unused corners of the paperboard together and traced and cut a smaller circle using a plate as a template. Out of the remaining paperboard, I cut two squares approximately the same size.

Using wood glue, I attached them to the centers of the circles where all the separate pieces met, to hold them together.

I spread more wood glue on the center squares and glued them together, so that the smaller circle now sat on top of the bigger circle, with my two squares of paperboard in between, making the top circle pop a bit. Finally, I cut the rest of the paperboard into four rectangles, which I glued to the back of the large circle to "float" the sun off the wall a little. Under one of the rectangles, I glued a loop of twine with which to hang the sun.
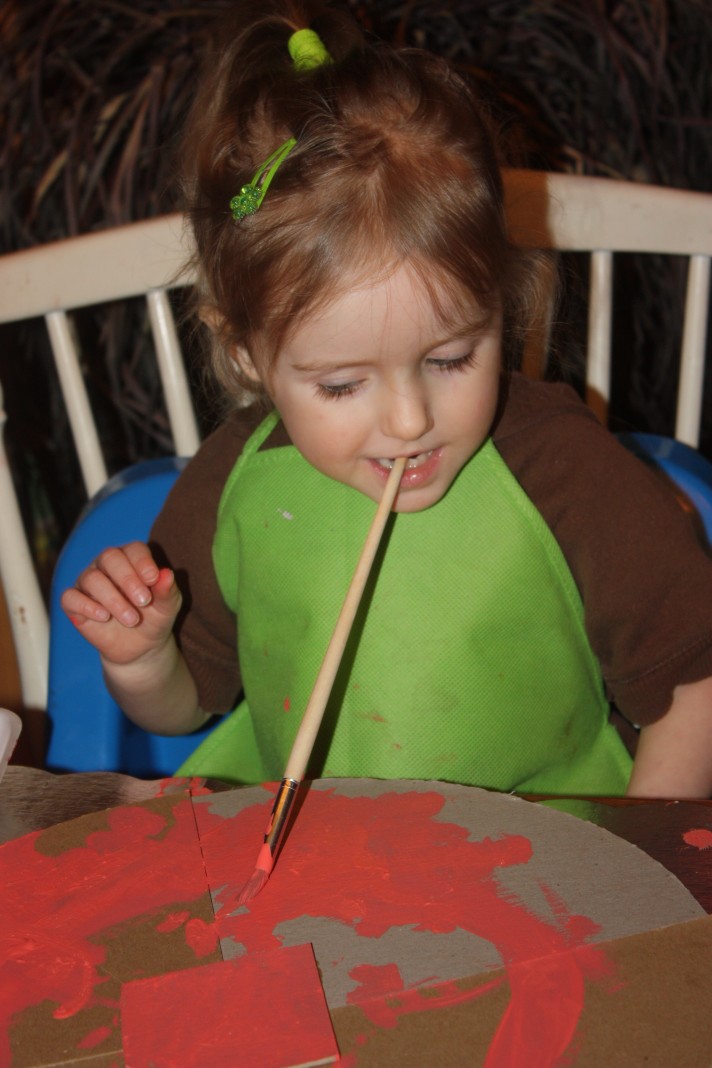
Kaia painted 16 craft sticks orange to arrange around the outside of the big circle. To make this task easier, I put a strip of tape across the backs of the sticks so they held together, allowing her to paint them as one. She then painted the large circle orange as well. She experimented with painting while holding the brush in her teeth. :D


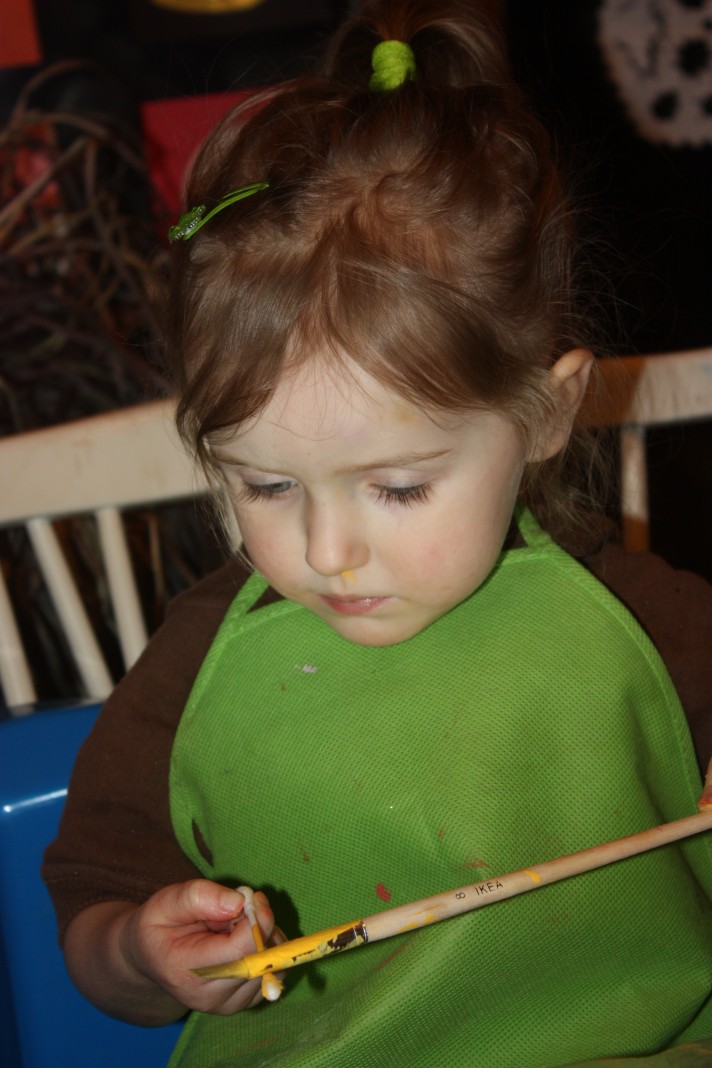
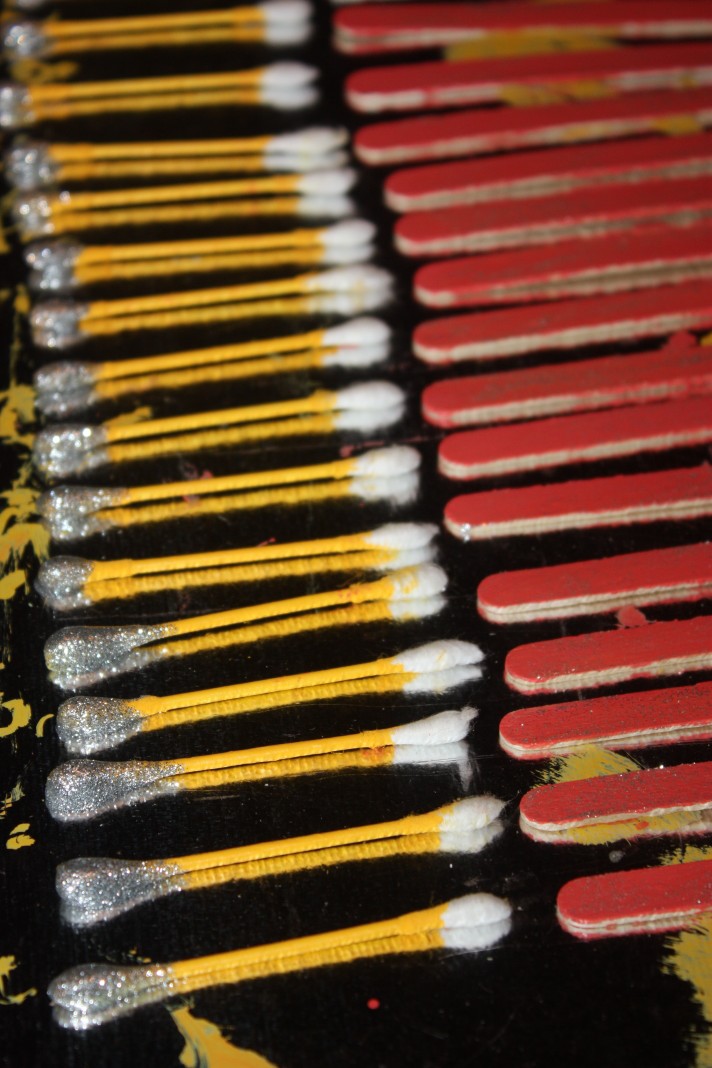
After she was done with the large circle, she painted the smaller circle yellow. This was also done using a combination of hand and teeth techniques. ;) I put the yellow paint in the tray with the orange, and we didn't rinse her brush in between, so the smaller circle came out with the yellow mottled beautifully with orange and every shade in between. We have a baggie of "dirty" cotton swabs that Kaia dropped all over the bathroom floor last week and we painted 16 of those, and 32 toothpicks, yellow. Kaia only had the patience to paint a few of the toothpicks, so I painted the rest.

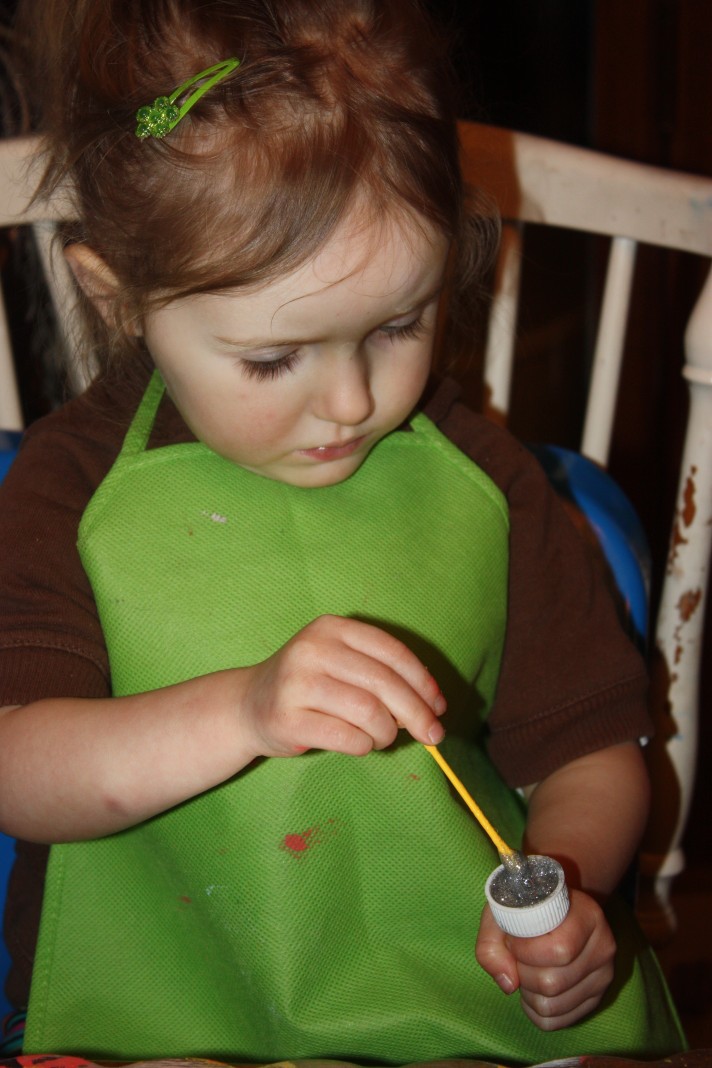
Then, because my toddler can hardly do a project that doesn't sparkle, Kaia dipped one end of each cotton swab in silver glitter glue. She was so happy with it that she gave the craft sticks a coat of glitter as well.
While those dried, we tore up orange tissue paper from the birthday party volcano, some of which had traces of red glitter glue on them. I laid down a coat of white craft glue on the orange circle, and Kaia stuck the tissue all over it.

I spaced dabs of wood glue around the back edge of the large circle and Kaia pressed, first the craft sticks, then the cotton swabs, into place. The glitter glue laden heads of the cotton swabs were heavy enough that I had to tape over the ends to hold them in place while the glue dried.


I also put wood glue along the backs of the seams of paperboard to help keep those together.

We left the entire thing to dry overnight, and the following day Kaia fixed glass stones onto the front with spots of white craft glue. Then we dipped the unpainted points of the toothpicks in wood glue and pushed those in under the center circle of the sun all the way around.
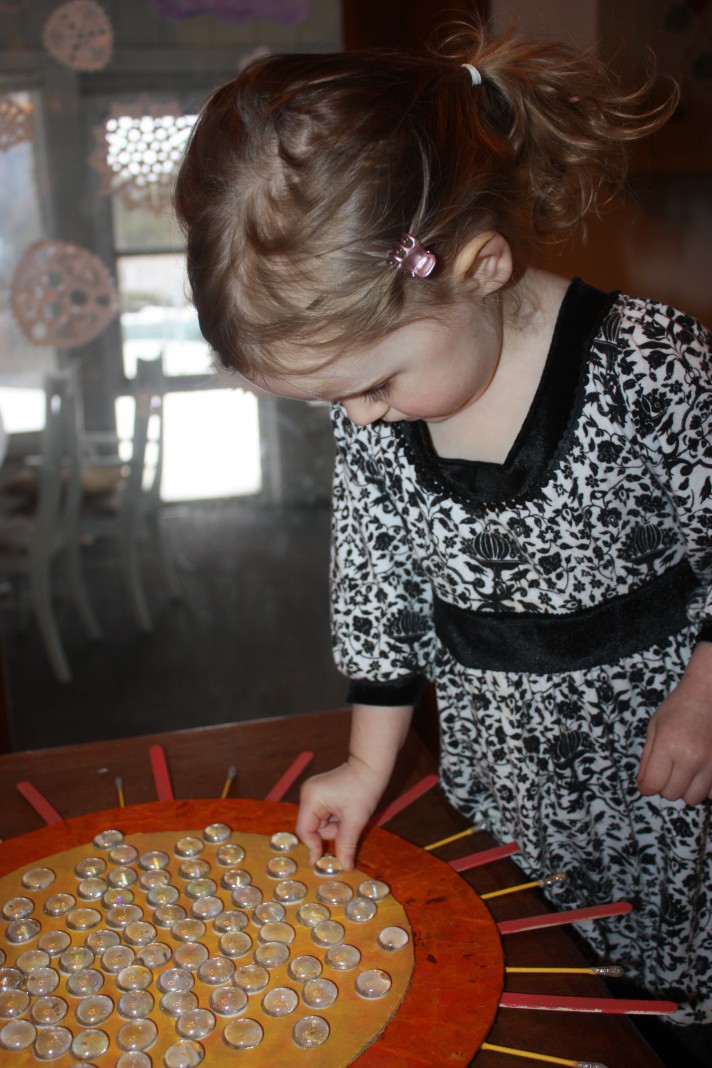

Now we have our very own sun to brighten our home every day of the Winter and shine lovingly on our plants, I love it! Kaia is as proud as can be, and loves to point it out to everyone, explaining that she made that sun.


No comments:
Post a Comment
Please leave a comment, I adore feedback! <3